
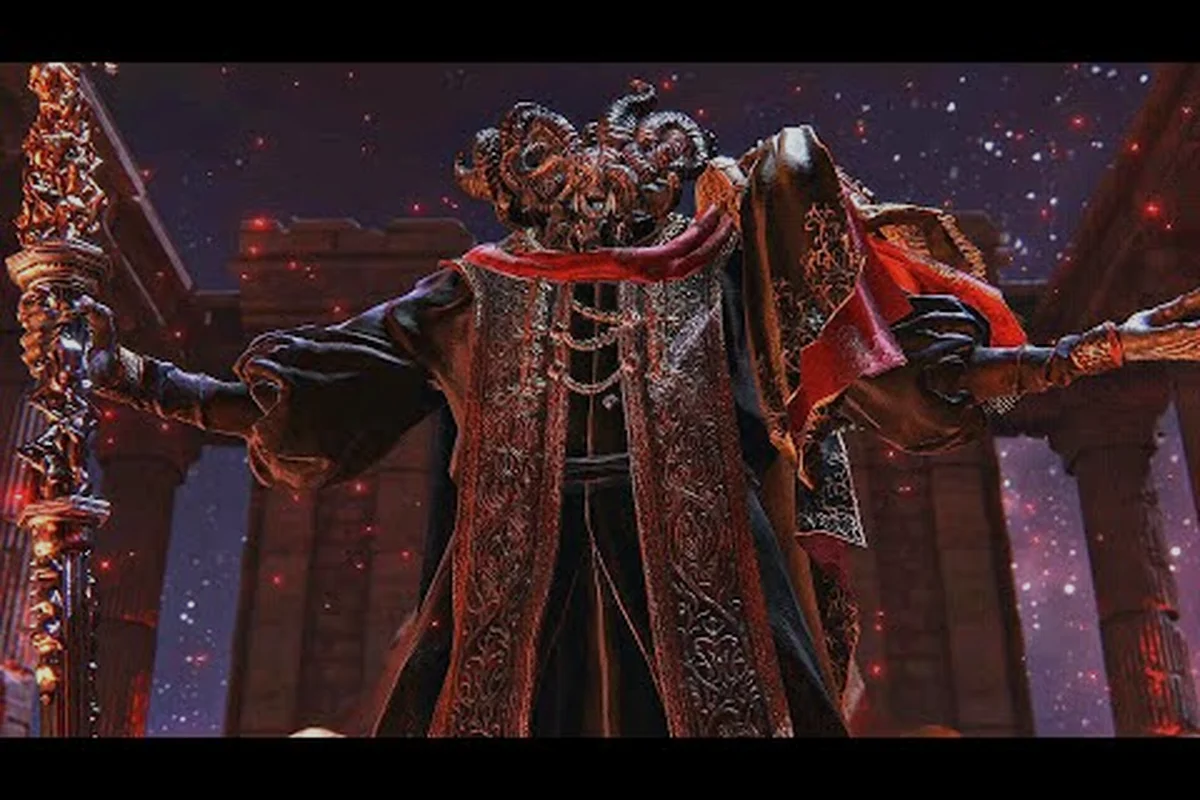
Mohg, Lord of Blood is one of the most punishing optional encounters in ELDEN RING Tarnished Edition, and the community consistently ranks him among the hardest gatekeepers in the game because his Nihil ritual can erase a full health bar in seconds. The official Bandai Namco page for the Tarnished Edition confirms that Mohg sits in Mohgwyn Palace as the primary gateway to the Shadow of the Erdtree DLC, which means mastering this fight is not just about bragging rights but about unlocking a massive chunk of endgame content. This guide breaks down his attack patterns, the exact role of the Purifying Crystal Tear, and the positioning strategies that turn a seemingly unfair fight into a manageable duel, so you can walk into Mohgwyn Palace with confidence instead of dread. This guide breaks down his attack patterns, the exact role of the Purifying Crystal Tear, and the positioning strategies that turn a seemingly unfair fight into a manageable duel, so you can walk into Mohgwyn Palace with confidence instead of dread—and once you’ve mastered his phase-two bloodflame onslaught, you’ll be ready to measure him against the rest of the game’s toughest threats in our Elden Ring Hardest Bosses Ranked list. For more detail, see how to beat Starscourge Radahn, covered in our related guide.
Understanding Mohg, Lord of Blood and His Arena
Mohg, Lord of Blood awaits you in Mohgwyn Palace, a subterranean region that you can reach through two distinct routes, and both of them require significant progression before they open up. The first method involves the teleporter hidden in the Consecrated Snowfield, which itself demands both halves of the Haligtree Secret Medallion, while the second route comes from completing White Mask Varre's questline and using the Pureblood Knight's Medal that he grants you. According to community reports, most players encounter Mohg for the first time around level 90 to 110, though the fight remains challenging even at higher levels because his damage output scales aggressively with his phase transitions.
The arena itself is a large, circular chamber with a blood-red atmosphere that matches Mohg's theme, and the floor is mostly flat with no environmental hazards to worry about, which actually works in your favor because you can focus entirely on spacing and dodging rather than terrain management. The fog wall sits at the entrance, and once you cross it, you have a brief moment to buff before the fight begins, so make sure your Physick flask is already prepared with the Purifying Crystal Tear because that single item determines whether you survive his phase transition or get wiped instantly.
| Route to Mohgwyn Palace | Requirements | Difficulty |
|---|---|---|
| Consecrated Snowfield Teleporter | Both Haligtree Medallion halves | High |
| Varre's Questline | Complete White Mask Varre's steps | Medium |
| Pureblood Knight's Medal | Varre's final quest reward | Medium |
The Mohgwyn Dynasty lore ties directly into the Shadow of the Erdtree expansion, and the official Tarnished Edition page highlights that Mohg serves as the narrative bridge to that content, which explains why so many players rush to defeat him despite his difficulty. His moveset combines wide sweeping attacks with blood-flame projectiles, and he gains additional fire-based attacks in phase two that punish players who stay too close for extended periods. Understanding his Nihil ritual is the single most important piece of knowledge for this fight, because that three-part incantation drains your HP three times in rapid succession, and without the proper countermeasure, it will kill you even with a fully upgraded Vigor stat.
Essential Preparations Before the Fight
Preparation is everything in this encounter, and players who walk in without the right tools often describe the experience as one of the most frustrating in the entire game because Mohg punishes both passive and aggressive playstyles equally. The Purifying Crystal Tear is the absolute must-have item, and you can obtain it by defeating the boss in the Second Church of Marika in the Altus Plateau, where an invader named Eleonora drops the tear after you eliminate her. Mixing this tear into your Flask of Wondrous Physick creates a protective barrier that nullifies the damage from his Nihil ritual, turning what would be a guaranteed death sentence into a brief moment where you can heal and reposition.
Bleed resistance is your second priority, and the official Tarnished Edition data confirms that Mohg applies heavy hemorrhage buildup with nearly every attack, so equipping armor pieces with high robustness or using the Mottled Necklace talisman can mean the difference between surviving a trade and dying to a status proc. The Lord of Blood's Exultation talisman is actually a reward for defeating Mohg, so you cannot use it for this fight, but the Rotten Winged Sword Insignia or the Shard of Alexander both work well if you are running a melee build that relies on consecutive attacks.
| Recommended Item | Source | Purpose |
|---|---|---|
| Purifying Crystal Tear | Eleonora in Second Church of Marika | Nullifies Nihil ritual damage |
| Mottled Necklace | Weeping Peninsula | Boosts robustness and bleed resistance |
| Lord of Blood's Exultation | Mohg drop (post-fight) | Not usable for this fight |
| Shard of Alexander | Alexander's questline | Boosts weapon skill damage |
Your weapon choice matters more than your armor in this fight because Mohg has a 40% resistance to fire damage but is weak to bleed, which means weapons like the Rivers of Blood katana or the Uchigatana with Seppuku can shred his health bar faster than almost any other option. If you are running a sorcery build, the Comet Azur spell combined with the Cerulean Hidden Tear can melt him during the opening seconds, though this strategy requires precise positioning and leaves you vulnerable if you miss the window. Spirit summons are highly effective here because Mohg's attacks are mostly single-target, so the Mimic Tear or Black Knife Tiche can draw his aggro while you deal damage from a safer angle.
Reaching Mohgwyn Palace: Teleporter vs. Varre's Questline
Two routes grant access to Mohgwyn Palace, each with distinct risk-reward tradeoffs. The Consecrated Snowfield teleporter requires defeating the area's boss and navigating past the Sanguine Noble ambush, but unlocks the fastest repeatable path for farming attempts. Alternatively, completing White Mask Varre's questline—which requires invading three times and using the Bloody Finger—teleports you directly to the palace's entrance. For players struggling with the Snowfield's environmental hazards, Varre's route is safer but locks you into a PvP requirement. Speedrunners favor the teleporter route, shaving roughly 4-6 minutes off pre-fight setup.
Boss Fight Strategy and Phase Breakdown
Phase One Attack Patterns and Counters
Purifying Crystal Tear: Nullifying the Nihil Ritual Mechanic
The Nihil ritual is Mohg's most lethal scripted sequence, draining your HP three times in succession during the Phase One-to-Two transition. Without mitigation, each pulse removes roughly 30-40% of your maximum HP, and the third pulse typically kills players below 1,400 Vigor investment. Craft the Purifying Crystal Tear by defeating the Erdtree Avatar in the Consecrated Snowfield, then mix it into your Flask of Wondrous Physick. When consumed before the ritual, the tear completely nullifies all three HP drains, turning a guaranteed death sentence into a free damage window where you can safely land a charged heavy attack.
Bleed Resistance and Hemorrhage Stacking in Phase One
Mohg's Phase One attacks inflict both physical damage and hemorrhage buildup, with his Trident's thrust attacks adding roughly 55 bleed buildup per hit. At 60 Vigor, your hemorrhage resistance sits near 400, meaning three consecutive Trident hits trigger blood loss for roughly 15% max HP damage. Equipping the Mottled Necklace (+40 resistance) or the Lord of Blood's Exultation talisman (which boosts attack power after blood loss) shifts this calculus. Players using bleed-infused weapons should note that Mohg himself is weak to bleed—his 280 hemorrhage resistance means roughly five procs of a standard Uchigatana with Seppuku will trigger blood loss, dealing 15% of his 18,000 HP pool per proc.
Phase one of the Mohg fight is all about learning his telegraphed attacks and punishing the recovery windows, and while his movements are fast, every single attack has a clear tell that you can react to with practice. His Bloodboon attack involves him raising his trident and slamming it into the ground, creating a wave of blood-flame that travels toward you, and the correct response is to jump over the wave or dodge sideways rather than rolling backward because the hitbox extends further than you might expect. The Blood Claw combo is his most dangerous close-range attack, consisting of three rapid slashes that end with a thrust, and you should dodge into the first slash and then roll diagonally to avoid the follow-up strikes.
The Trident Thrust is a quick poke that he uses to punish players who try to heal at close range, and while it deals moderate damage, the real threat is the bleed buildup that comes with it, so always wait for him to finish his current combo before drinking from your flask. His Bloodflame Talons attack involves him summoning a series of blood-flame explosions that track your position, and the best strategy is to sprint in a circle around him rather than trying to dodge each individual explosion because the tracking is aggressive. When he raises his trident and chants, that is the start of his Nihil ritual, and this is where your Purifying Crystal Tear becomes essential because it nullifies the damage from all three pulses.
| Phase One Attack | Tell | Counter |
|---|---|---|
| Bloodboon | Trident slam into ground | Jump or dodge sideways |
| Blood Claw Combo | Three rapid slashes | Dodge into first, roll diagonally |
| Trident Thrust | Quick forward poke | Wait for combo to end |
| Bloodflame Talons | Summoning explosions | Sprint in a circle |
Positioning during phase one is all about staying at mid-range rather than hugging him or keeping maximum distance, because mid-range lets you react to his attacks while still being close enough to punish his recovery windows. Players who stay too far away trigger his Bloodboon attack more frequently, which creates a frustrating loop of dodging projectiles without dealing damage, while players who stay too close get caught in his Blood Claw combo repeatedly. The sweet spot is roughly two to three roll distances away from him, where you can bait his thrust attack, dodge it, and land one or two hits before retreating to reset the spacing.
Phase Two Transitions and Fire Attacks
Phase Two Fire Attacks: Dodging the Bloodboon and Trident Combos
When Mohg's wings unfurl, his Trident ignites with bloodflame, adding fire damage to every melee swing—each hit now deals roughly 340 physical plus 120 fire damage. His new Bloodboon attack launches a wide arc of flame that lingers for 3 seconds, punishing players who panic-roll backward. The correct response is to roll diagonally forward-left, passing through the flame's gap to reach his back for a punish window. His triple-Trident combo ends with a delayed overhead slam that tracks your position; wait for the visual cue of his arm reaching full extension before rolling. Fire resistance from the Flamedrake Talisman +2 reduces incoming fire damage by 20%, effectively negating the Phase Two damage increase.
When Mohg's health drops below roughly 50 percent, he enters phase two and gains a set of fire-based attacks that dramatically change the flow of the fight, and this is where most players die because they fail to adapt to the new timing. The Nihil ritual triggers at the start of phase two, and this is the moment where your Purifying Crystal Tear proves its worth, because without it, the three HP drains will kill you regardless of your Vigor investment. After the ritual completes, Mohg gains fiery wings that are purely cosmetic, but his attacks now leave lingering blood-flame patches on the ground that punish players who stay in one spot for too long.
His new Bloodflame Explosion attack involves him slamming his trident into the ground and creating a massive area-of-effect blast around him, and the tell is a brief charge-up animation where he plants his feet and grips the trident with both hands. The correct response is to sprint away from him immediately because the explosion radius is larger than it looks, and rolling through it is risky because the lingering flames can still damage you after the initial blast. His Fire Breath attack is a cone of blood-flame that he sweeps across the arena, and the best counter is to dodge perpendicular to the cone rather than trying to outrun it because the sweep covers a wide angle.
| Phase Two Attack | Tell | Counter |
|---|---|---|
| Nihil Ritual | Three-part chant | Purifying Crystal Tear |
| Bloodflame Explosion | Charge-up with trident grip | Sprint away, avoid lingering flames |
| Fire Breath | Cone sweep | Dodge perpendicular |
| Blood Claw (enhanced) | Longer combo chain | Wait for full combo, then punish |
The enhanced Blood Claw combo in phase two adds an extra hit to the chain, which catches players who are used to the phase one timing and dodge too early, so you need to wait for the full animation before committing to your counterattack. Community testing suggests that Mohg becomes slightly more aggressive in phase two, with shorter recovery windows after his attacks, which means you should focus on landing one or two hits per punish rather than trying to chain extended combos. The fire resistance of your armor becomes more important in this phase because the lingering flames deal fire damage over time, and players who stack fire resistance report significantly more survivability during the extended fight.
Optimal Builds and Weapon Strategies
The most effective builds against Mohg, Lord of Blood focus on exploiting his bleed weakness while maintaining enough survivability to endure his phase two onslaught, and the community has converged on several proven setups that balance damage with safety. The Rivers of Blood katana remains the most popular choice because its weapon skill, Corpse Piler, deals massive bleed buildup at range, allowing you to proc hemorrhage from a safe distance without exposing yourself to his melee combos. For players who prefer strength builds, the Greatsword with the Bloody Slash ash of war provides similar bleed pressure with heavier stagger potential, though the slower attack speed means you need to be more precise with your positioning.
Sorcery builds have a different approach entirely, and the Comet Azur strategy involves using the Cerulean Hidden Tear in your Physick to eliminate FP consumption for a few seconds, then positioning yourself directly in front of Mohg before he aggroes and unleashing the full beam. This strategy can chunk his health bar by 60 to 80 percent in a single cast, but it requires precise timing and leaves you completely vulnerable if you mistime the setup, so it is recommended for experienced players who know the fight well. Incantation builds can use Pest Threads or Black Flame for consistent damage, though these options require more sustained engagement with his attack patterns.
| Build Type | Primary Weapon | Key Talisman | Strategy |
|---|---|---|---|
| Bleed Katana | Rivers of Blood | Shard of Alexander | Corpse Piler at range |
| Strength Bleed | Greatsword + Bloody Slash | Axe Talisman | Heavy stagger + bleed |
| Sorcery Burst | Lusat's Staff | Graven-Mass Talisman | Comet Azur opening |
| Incantation | Erdtree Seal | Flock's Canvas Talisman | Pest Threads sustained |
The Mimic Tear spirit summon is widely considered the best option for this fight because it copies your build and creates a second damage source that can draw Mohg's aggro, giving you breathing room to heal and reposition. Players who use the Black Knife Tiche report that her ranged attacks and high mobility make her particularly effective at surviving Mohg's phase two fire attacks, though she deals less raw damage than the Mimic Tear. If you are struggling with the fight, consider summoning cooperators through the Small Golden Effigy, because having multiple players split Mohg's aggro dramatically reduces the pressure on any single player.
Positioning Tips and Common Mistakes
Positioning is the difference between a clean kill and a frustrating hour of repeated deaths, and the most common mistake players make is staying too close to Mohg during phase two when his lingering fire patches punish extended melee contact. The optimal positioning strategy involves maintaining a mid-range distance where you can react to his attacks while still being close enough to punish his recovery windows, and this applies to both phases of the fight. When he begins his Nihil ritual, use the brief animation window to drink your Physick flask and reposition yourself to the side of him rather than directly in front, because his follow-up attacks after the ritual often target the area where you were standing.
Another frequent mistake is panic rolling during his Bloodflame Talons attack, because the tracking on those explosions punishes players who roll too early and get caught in the follow-up blast. The correct response is to sprint in a wide circle around him, maintaining your distance while the explosions detonate behind you, then close in for a punish once the attack finishes. Players also underestimate the importance of stamina management in this fight, because Mohg's long combo chains require multiple rolls, and running out of stamina mid-combo leaves you unable to dodge the final hit.
-
Stay at mid-range: Close enough to punish, far enough to react to his attacks.
-
Use the Nihil window: Drink your Physick and reposition during the ritual animation.
-
Sprint, don't roll: Circle around Bloodflame Talons instead of dodging each explosion.
-
Manage stamina: Save enough for a full dodge chain during his combos.
-
Watch for lingering flames: Move away from blood-flame patches after phase two begins.
The lock-on camera can be your enemy in this fight because Mohg's quick movements and the arena's circular layout sometimes cause the camera to swing wildly, so consider unlocking the camera when you need to sprint around his attacks. Players who play unlocked report better spatial awareness during the Bloodflame Talons attack, because they can see the full pattern of explosions rather than just the ones directly in front of them. The target lock is still useful for landing your own attacks, so the best approach is to toggle between locked and unlocked depending on the situation, locking on when you are punishing and unlocking when you need to reposition.
Frequently Asked Questions
What level should I be to fight Mohg, Lord of Blood?
Most players tackle Mohg around level 90 to 110 with a +20 or higher weapon upgrade, though the fight remains challenging at higher levels because his damage scales with your progression. Focus on having at least 40 Vigor to survive his phase two attacks, and prioritize bleed resistance through armor and talismans.
Where do I get the Purifying Crystal Tear?
Defeat Eleonora, Violet Bloody Finger, at the Second Church of Marika in the Altus Plateau to obtain the Purifying Crystal Tear. Mix it into your Flask of Wondrous Physick, and it will nullify the damage from Mohg's Nihil ritual during his phase transition.
Is Mohg weak to bleed?
Yes, Mohg has a significant weakness to bleed buildup, making weapons like Rivers of Blood or any weapon with the Bloody Slash ash of war highly effective. His fire resistance is 40 percent, so avoid fire-based attacks, and focus on physical damage combined with bleed procs.
Can I summon help for the Mohg fight?
Yes, you can summon both spirit ashes and cooperators through the Small Golden Effigy. The Mimic Tear is the most popular spirit choice because it copies your build and draws aggro, while player summons can split Mohg's attention and reduce the pressure on any single fighter.
What happens after I defeat Mohg?
Defeating Mohg, Lord of Blood in Mohgwyn Palace unlocks access to the Shadow of the Erdtree DLC, as he is its narrative gatekeeper. You also receive his Great Rune and the Remembrance of the Blood Lord, which you can exchange for his weapons or incantations at Roundtable Hold.